
Start a transaction
Once a terminal has been paired, you can start a transaction.
If you haven’t paired your terminal yet, here’s a guide to get you started.
Starting a transaction is similar to the pairing process where you post to the API to initiate the process and then poll the URL that is returned and wait for the status to change.
Follow the below steps to start a transaction:
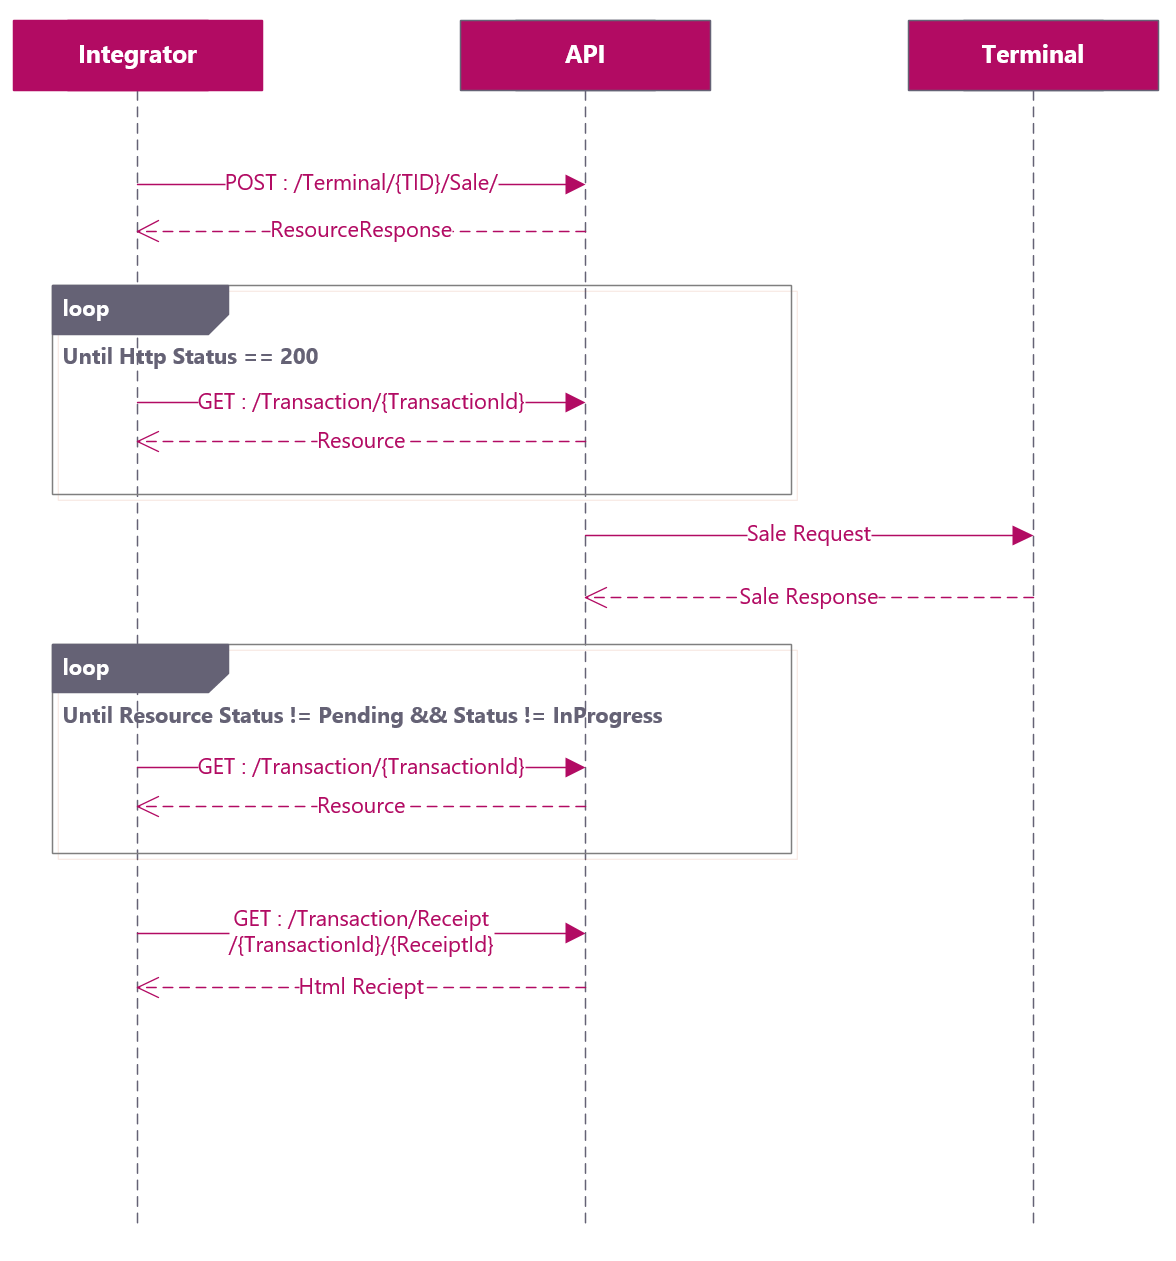
The process for a sale can be summarised as
Send a post to
/Terminal/{tid}/Sale/with the body containing the JSON{ amount = xx.xx }You will receive a response containing a
transactionIDand aResourceUrlYou can then poll the resource URL by checking the http status. Initially, you should expect a 404 error as the transaction has not been created, but within a few seconds, you will receive a 200 error with a content body containing transaction details. The object returned will have a Pending status.
Continue polling the resource URL until the status changes from
PendingtoInProgressand then finally to one of the complete states such asApprovedOnce the transaction is complete the object returned from the
ResourceUrlwill contain an array of receipt information in the `Receipts` property.You can now send a get request to the
/Transaction/Receipt/{TransactionId}/{ReceiptId}URL where you will find an HTML formatted copy of either the merchant or customer receipts.
Example Code
The code example below shows the following :
Initial request to API to initiate transaction
Polling the API at 500ms intervals waiting for a complete status.
The code assumes that a valid token has already been acquired and that an HttpClient has been instantiated.
Transaction Statuses
Below is a list of the transaction statuses that you could encounter.
Transaction Types
There are a number of transaction types which can be carried out which follow the same process as the example above, in these cases all that needs to change is the URL that the initial post is sent to as shown in the table below.
Call: 08081 633 672
4th Floor | Highbank House | Exchange Street | Stockport | SK3 0ET


Registered in England and Waled under company number 3102137 | Copyright takepayments © 2023